Branding the Platform
- Click on ADMIN then RESELLER SETTINGS.
- Under THEME SETTINGS, click on the Edit icon on your right.
- Select theme color of your choice
- When done, click ''UPDATE'' to save the changes.
- Under BRANDING, click on the small edit icon on your right.
- Click on the UPLOAD BACKGROUND button under change background image.
- We recommend using an image with dimensions of 1920x1080
- Please also make sure the background image filesize is not too big as this will slow down your login page load time. The file size should be kept to under 600KB for best performance
- .png format is recommended but you can also save it in .gif, .jpg and .jpeg formats.
- Select the image source and upload
- After uploading the image, you can crop the image:
- If you do not wish to crop the image, extend the boundary to edges of full image:

- After you have chosen the boundary/cropping, click UPLOAD
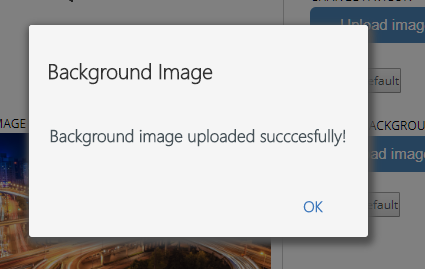
- After the image has uploaded you will see this message:
- Next, click on the upload icon to save the changes.
- Now visit the login page and you should see your background image:
- Click on ADMIN and then navigate to RESELLER SETTINGS.
- Under BRANDING, click on the edit icon on your right.
- Click on the UPLOAD FAVICON Button under CHANGE FAVICON
- Select your .ICO file and click UPLOAD FAVICON, then click UPDATE
NOTE:
FavIcons are of type .ICO format
To generate a favicon from an image, goto https://www.favicon-generator.org/ or https://www.websiteplanet.com/webtools/favicon-generator/
- Generate a square image of 16x16 dimensions from an image you upload
- download the favicon.ico file
- Click on ADMIN and then click on RESELLER SETTINGS.
- Scroll down to the PAGE TITLE section, and click on the small edit icon on the right of this box.
- Edit to the PAGE TITLE of your choice. Your title can have any amount of characters but it's usually best to keep it short.
- When done, click ''UPDATE'' to save the changes
Related Articles
Platform user manual
a. Map Page The Map page is the default page on login. This is where you do all your basic monitoring of vehicle positions and statuses. From this page you can select assets. This centers and zooms the screen to show the unit in detail with an asset ...How to add drivers
Overview The easiest way to add a Driver to the platform is using the ADD ASSET WIZARD 1. Configuring the web app so the driver shows under the correct client with the desired name 2. Setting up the hardware with the correct configuration so as to ...Pointing a tracking device to the platform
To point a GPS Tracking device to our servers, you need the following Server address Where do I point my trackers - data.gpsiot.net Port Find the port for my tracker - e.g. Teltonika uses port 12070 IMEI Number or Device ID The IMEI/Device ID is ...How to visualize fuel on the platform
How to Read Fuel Data in the Platform This guide explains how to view and interpret fuel data from your vehicles 1. Viewing Current Fuel Level (Live Map) Steps: Go to Map Select your vehicle from the list Click on the vehicle to open the info panel ...Connecting Digital Matter Devices to the Platform via Connector
✅ 1. How to Create a Flexi TCP Connector Open Device Manager. Go to Connectors (left menu). Click the New button. Give the connector a name (e.g., My Flexi TCP Server). For Connector Type, select: ➤ Flexi TCP Connector Choose your Distributor / ...